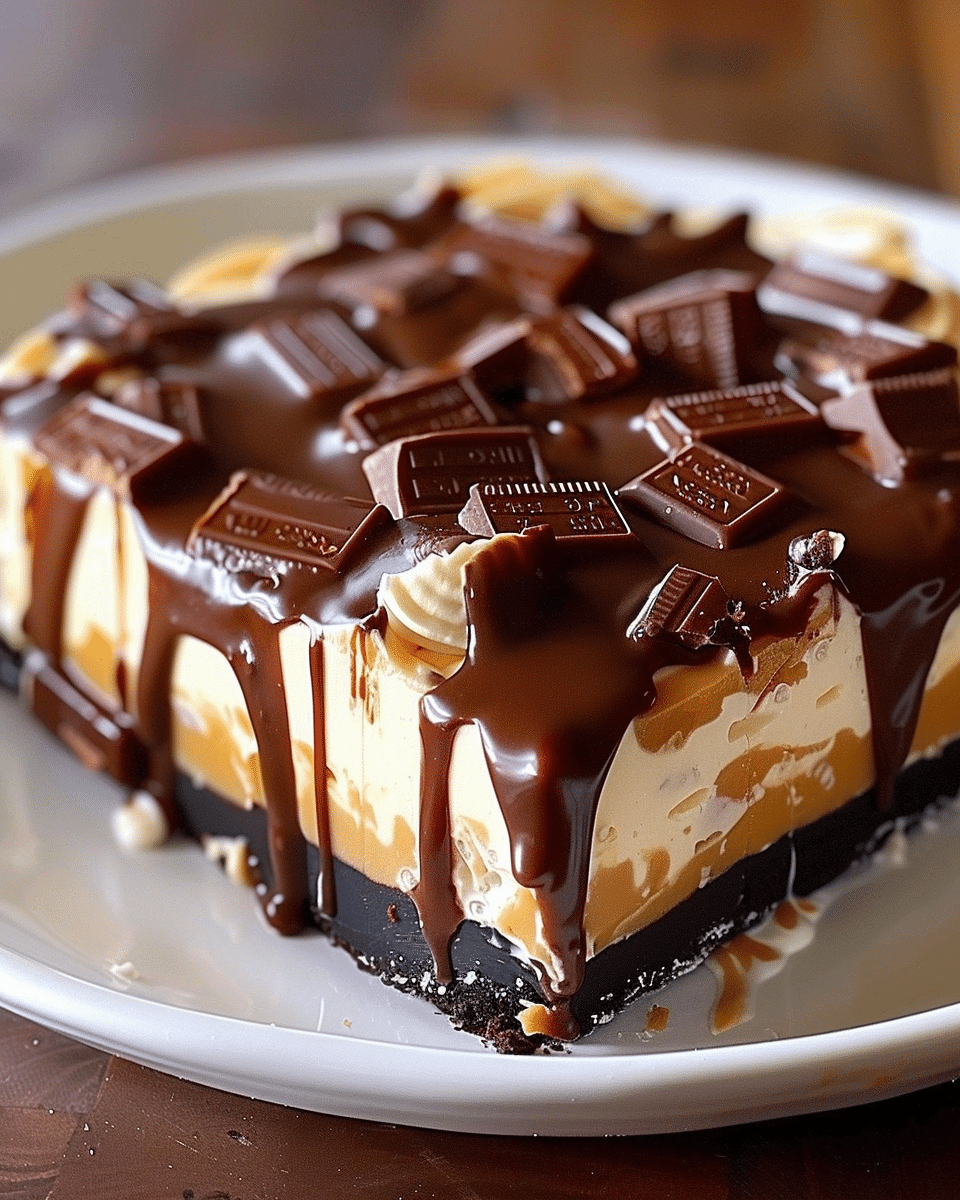
When I’m craving something rich, creamy, and packed with chocolate and caramel flavor, I make this no-bake Twix cheesecake. Inspired by the classic candy bar, this dessert has a buttery cookie crust, a velvety cheesecake filling, and irresistible layers of caramel and chocolate that bring every bite over the top. It’s no-bake, no-stress, and absolutely worth every forkful.
Why You’ll Love This Recipe
I love this cheesecake because it’s decadent without being complicated. The layers come together easily, and the textures are spot-on—from the cookie-like base to the smooth cream cheese center and that final chocolatey finish. It’s a guaranteed hit for birthdays, holidays, or any time I want to impress with a dessert that’s secretly simple to make.
Ingredients
(Here’s a tip: Check out the full list of ingredients and measurements in the recipe card below.)
For the crust:
-
Chocolate or shortbread cookies (crushed)
-
Melted butter
For the cheesecake filling:
-
Cream cheese (softened)
-
Powdered sugar
-
Vanilla extract
-
Heavy cream (whipped to stiff peaks)
For the topping:
-
Thick caramel sauce (store-bought or homemade)
-
Melted milk chocolate or chocolate ganache
-
Optional: chopped Twix bars or crushed cookies for garnish
Directions
-
I start by mixing the crushed cookies and melted butter, pressing the mixture firmly into the bottom of a springform pan to form the crust. I chill it in the fridge while I prepare the filling.
-
In a mixing bowl, I beat the cream cheese, powdered sugar, and vanilla until smooth and creamy.
-
I fold in the whipped heavy cream gently until fully combined, keeping the filling light and fluffy.
-
I spread the cheesecake mixture over the chilled crust, smoothing the top evenly.
-
I drizzle a generous layer of caramel sauce over the cheesecake and let it chill for at least 4 hours (or overnight) until set.
-
Just before serving, I pour melted chocolate over the top and garnish with chopped Twix bars or cookie crumbs if I want an extra treat.
-
I let it sit for a few minutes so the chocolate softens slightly, then slice and serve.
Servings and timing
This cheesecake serves 10–12.
Prep time is 25 minutes, and chilling time is at least 4 hours. I usually make it the night before for the best texture.
Variations
-
I use a graham cracker crust if I want a lighter twist.
-
I’ve mixed chopped Twix bars right into the cheesecake layer for added crunch.
-
For a salted caramel version, I top with flaky sea salt before chilling.
-
I swap in dark chocolate for a richer, more intense finish.
Storage/reheating
I store leftovers covered in the fridge for up to 4 days. It holds up well and stays creamy and firm. I don’t freeze this dessert—cream cheese-based fillings can get grainy after thawing. No reheating needed—just slice and enjoy chilled.
FAQs
Can I use Cool Whip instead of whipped cream?
Yes, I’ve used it when short on time. Just fold it gently into the cream cheese mixture to keep the filling fluffy.
What’s the best way to slice this cheesecake?
I use a sharp knife dipped in hot water and wiped clean between each slice—it gives me clean, smooth cuts.
Do I have to use a springform pan?
It helps with clean removal, but I’ve made this in a deep-dish pie plate or 8×8 baking pan with parchment for lifting.
Can I make this gluten-free?
Yes, I use gluten-free cookies for the crust and double-check that the caramel and chocolate are gluten-free too.
Is this overly sweet?
It’s sweet, but the tang of the cream cheese balances it out. I use less caramel or chocolate on top if I want a milder version.
Conclusion
No-bake Twix cheesecake is one of those desserts that looks impressive, tastes incredible, and couldn’t be easier to make. It’s creamy, crunchy, chocolatey, and caramelly—basically, everything I love in one chilled slice. Whether I’m celebrating or just want to treat myself, this cheesecake always hits the sweet spot.
Print
No-Bake Twix Cheesecake: A Layered, Candy-Inspired Dessert Dream
- Prep Time: 25 minutes
- Total Time: 4 hours 25 minutes
- Yield: 10–12 slices
- Category: Dessert
- Method: No-Bake
- Cuisine: American
- Diet: Vegetarian
Description
This no-bake Twix cheesecake is a decadent, layered dessert with a cookie crust, creamy cheesecake center, and rich caramel and chocolate topping—just like the classic candy bar. It’s indulgent, easy to make, and perfect for any occasion.
Ingredients
- For the crust:
- 2 cups chocolate or shortbread cookies (crushed)
- ½ cup unsalted butter (melted)
- For the cheesecake filling:
- 16 oz cream cheese (softened)
- ¾ cup powdered sugar
- 1 tsp vanilla extract
- 1 cup heavy cream (whipped to stiff peaks)
- For the topping:
- ½ cup thick caramel sauce (store-bought or homemade)
- ½ cup melted milk chocolate or chocolate ganache
- Optional: chopped Twix bars or crushed cookies for garnish
Instructions
-
Mix crushed cookies with melted butter and press into the bottom of a springform pan to form the crust. Chill while preparing the filling.
-
In a bowl, beat cream cheese, powdered sugar, and vanilla until smooth.
-
Fold in the whipped cream gently until fully combined.
-
Spread the cheesecake filling evenly over the crust and smooth the top.
-
Drizzle caramel sauce over the top and chill the cheesecake for at least 4 hours, or overnight.
-
Before serving, drizzle with melted chocolate and garnish with chopped Twix bars or cookie crumbs.
-
Let sit at room temperature for a few minutes before slicing and serving.
Notes
- Use a hot knife for clean slices.
- Store covered in the fridge for up to 4 days—do not freeze.
- Make ahead for parties or holidays for stress-free dessert prep.


Your email address will not be published. Required fields are marked *